Book Appointment Now
14-Day Lip Filler Recovery Timeline: Day-by-Day Healing Guide
14-Day Lip Filler Recovery Timeline (Day-by-Day Guide)
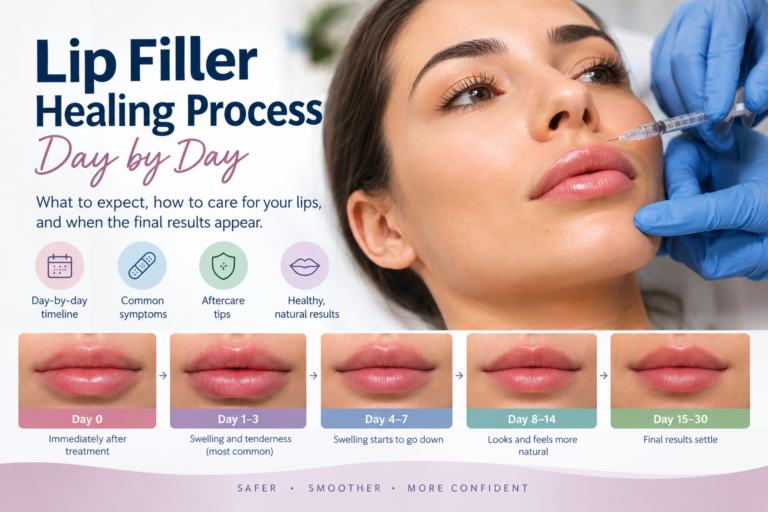
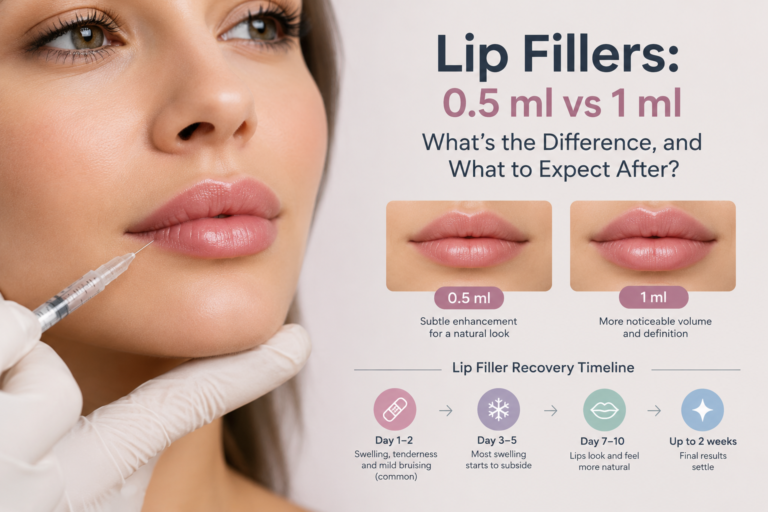
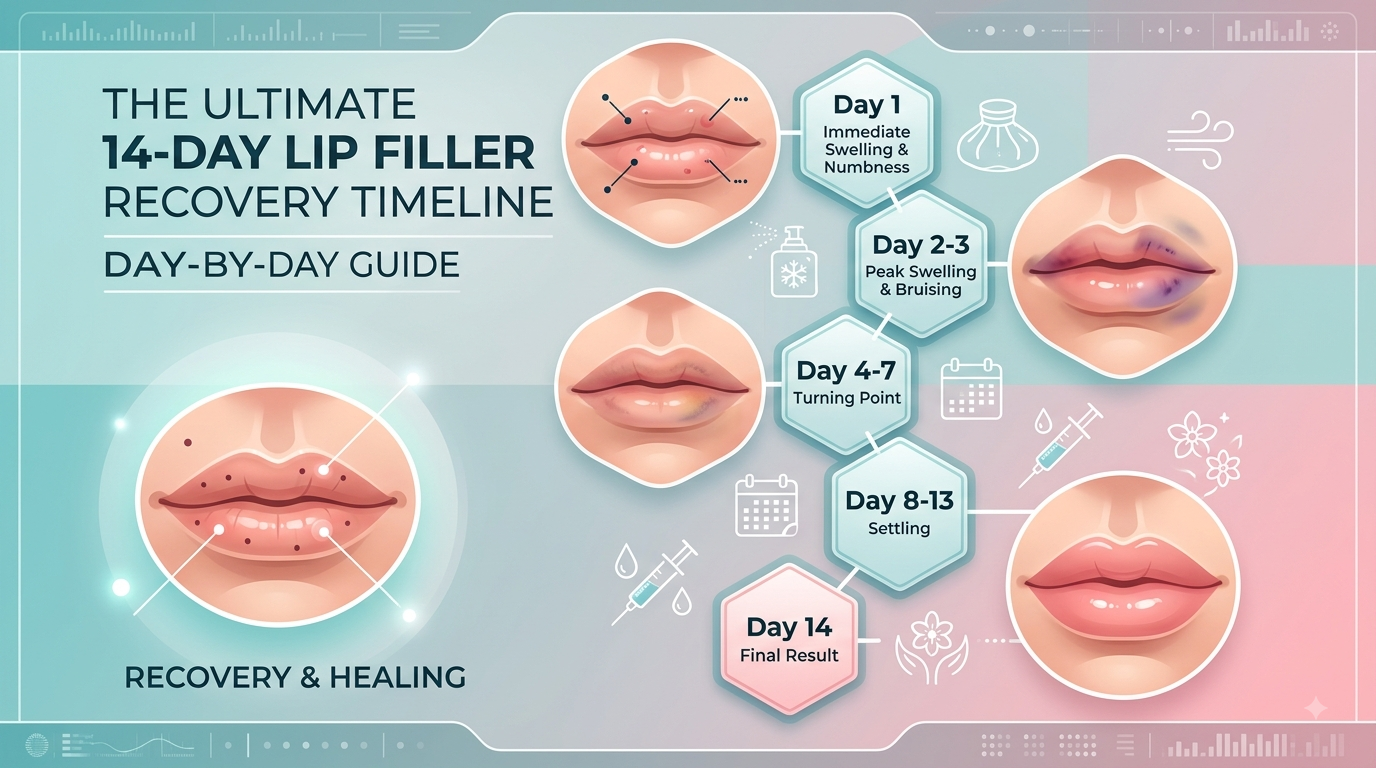
At a Glance: The 14-Day Lip Filler Healing Stages
Before diving into the detailed daily breakdown, here is a high-level overview of how your lips evolve during the typical two-week recovery phase.
| Stage | Days | Primary Symptoms | Main Objective |
|---|---|---|---|
| Acute Phase | Days 1 – 3 | Peak swelling, tenderness, firmness, bruising, mild asymmetry | Minimize inflammation, manage discomfort, protect injection sites |
| Sub-Acute Phase | Days 4 – 7 | Decreasing swelling, fading bruises, potential minor lumps | Hydrate tissue, avoid pressure, allow filler integration |
| Settling Phase | Days 8 – 13 | Significant softening, symmetrical alignment, minimal tenderness | Monitor shape, maintain gentle hydration, evaluate progress |
| Final Result | Day 14+ | Soft, fully integrated filler, final volume, zero swelling | Schedule follow-up/touch-up if desired |
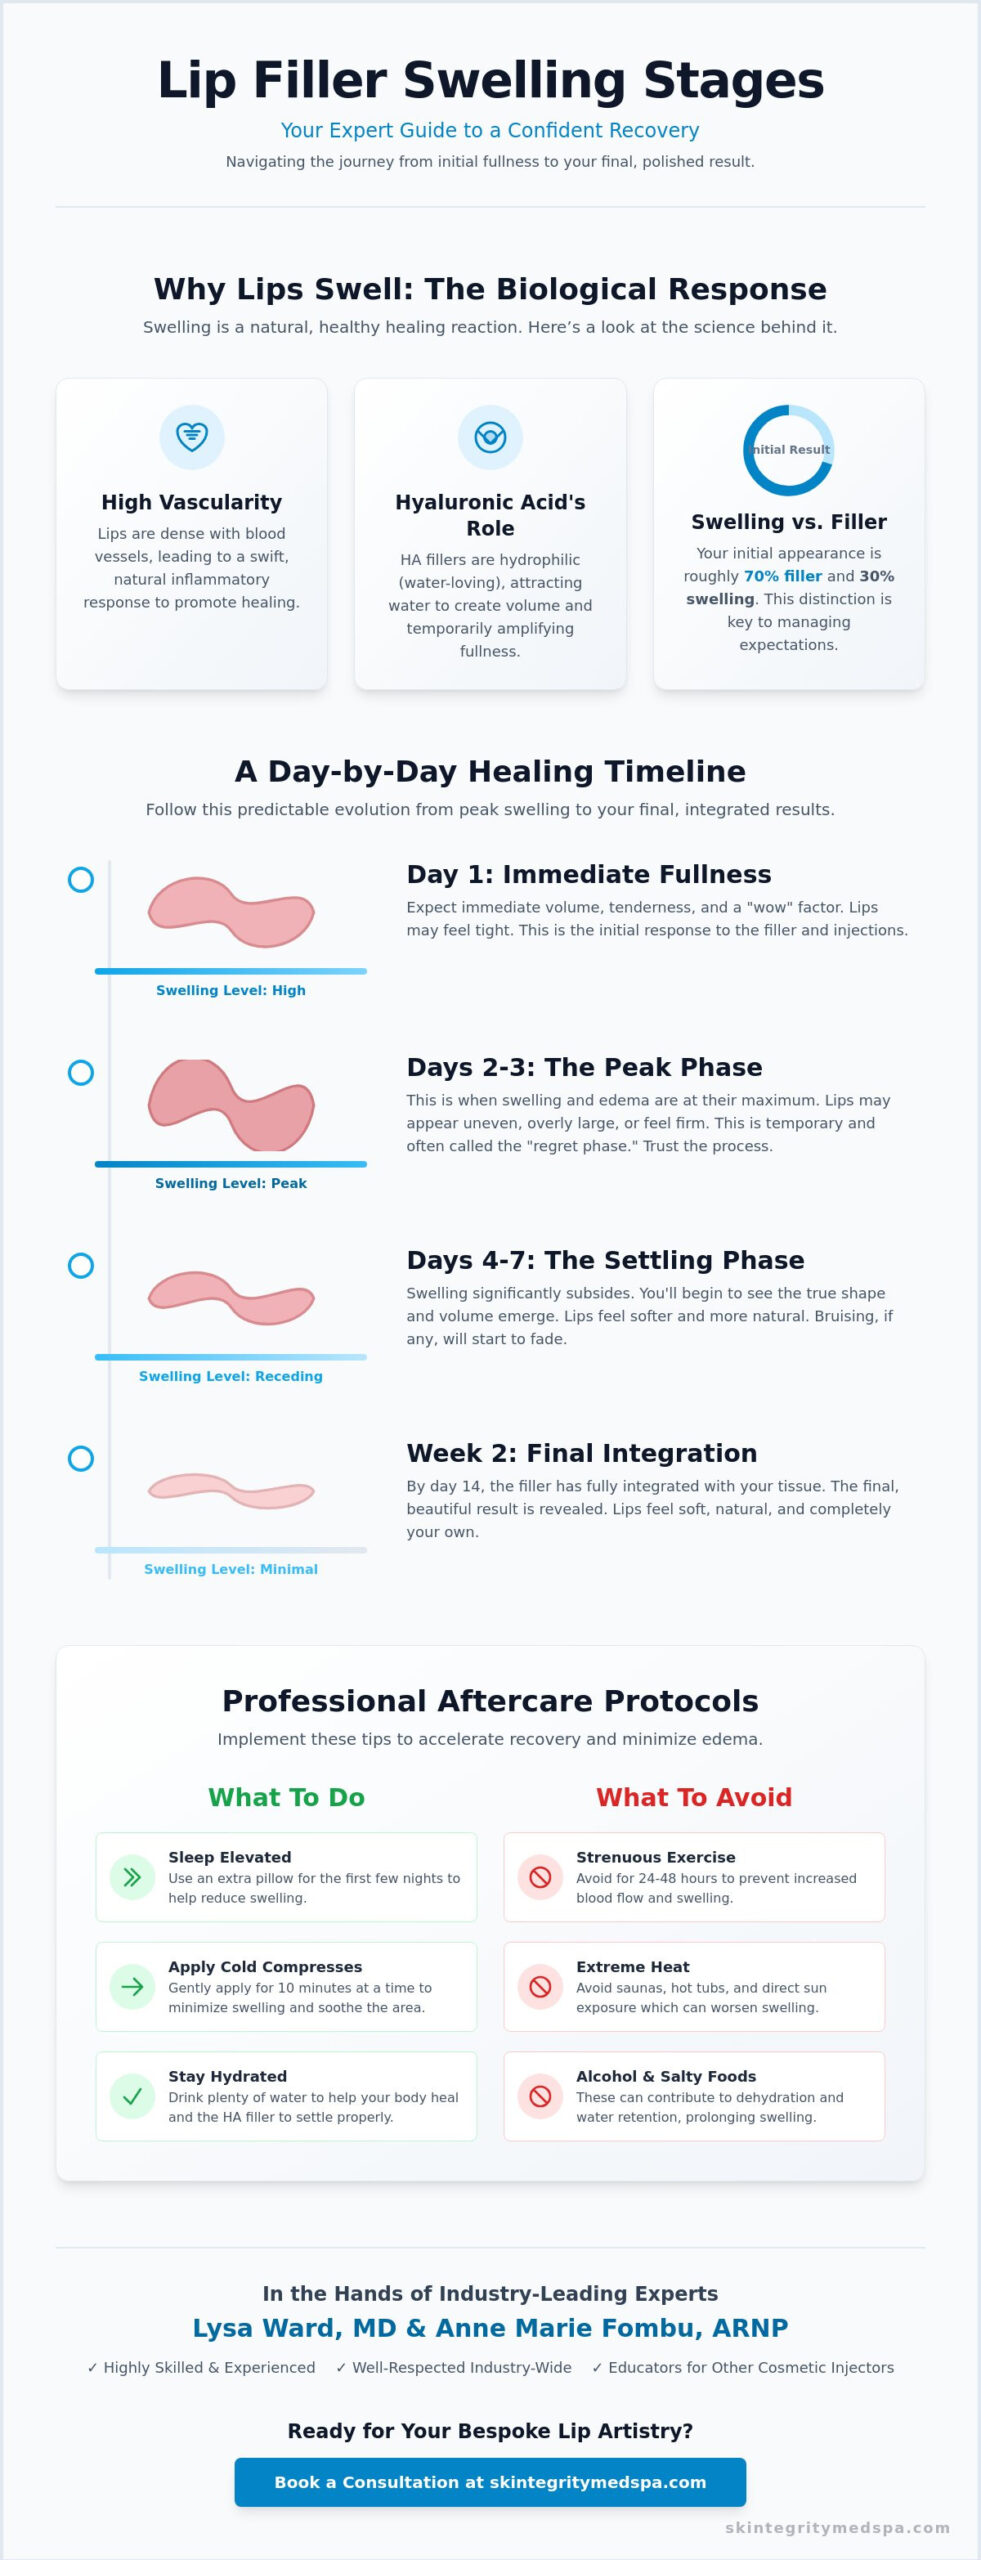
Figure 1: High-level visual timeline overview of lip filler recovery stages.
Day 1: Injection Day & Immediate Post-Treatment Reaction
Immediately after leaving the clinic, your lips will look dramatically larger than expected. This instant size is a combination of the dermal filler volume itself and your body’s natural inflammatory response to the micro-trauma caused by needle or cannula punctures.
What You Will Feel and See
- Numbness: If your practitioner used a topical numbing cream or a filler containing lidocaine, your lips and surrounding mouth area will feel numb for 1 to 3 hours post-procedure.
- Rapid Swelling: Hyaluronic acid is hydrophilic, meaning it immediately attracts water molecules. Swelling begins within minutes and intensifies over the course of the evening.
- Tenderness and Tightness: As the numbing agent wears off, you will experience tightness, localized throbbing, and tenderness to the touch.
- Pinpoint Bleeding or Redness: Small red spots will be visible at each entry point.
Day 1 Care Guidelines
- Apply an ice pack wrapped in a clean cloth for 10 minutes at a time to keep acute inflammation down.
- Keep your head elevated, especially when resting or sleeping.
- Avoid touching, pressing, or rubbing your lips to prevent displacement of the fresh filler.
- Do not apply lipstick, lip balm, or gloss to prevent introducing bacteria into open needle tracks.
Days 2–3: Peak Swelling, Bruising & Asymmetry
Days 2 and 3 are universally considered the most challenging days of lip filler recovery. You may wake up on Day 2 with what is affectionately termed “duck lips” or “sausage lips.” Rest assured: this extreme volume is temporary and does not reflect your final result.
What to Expect During the Peak Phase
- Maximum Inflammation: Swelling typically peaks within 24 to 48 hours post-injection. The upper lip often swells more aggressively than the lower lip.
- Bruising Emergence: Blue, purple, or dark red spots may bloom around the vermilion border or inside the lip body where blood vessels were nicked during injection.
- Temporary Asymmetry: Swelling rarely occurs evenly. One side of your lip may look significantly larger or lumpier than the other. This is almost always uneven fluid retention rather than uneven injection technique.
- Firmness: Your lips will feel firm, tight, and slightly unnatural when speaking or smiling.

| Symptom | Is It Normal? | Recommended Action |
|---|---|---|
| Uneven top vs. bottom lip swelling | Yes — Very normal | Continue light cold compresses; do not try to massage it flat. |
| Dark purple bruising on the lip | Yes — Common | Apply topical Arnica gel or take oral Arnica supplements. |
| Small, firm bumps under the skin | Yes — Normal early on | Leave them alone; they usually soften as swelling subsides. |
| Blanching (white skin) + severe pain | NO — Abnormally high risk | Contact your practitioner immediately (potential vascular event). |
Days 4–7: The Turning Point & Sub-Acute Healing
By Day 4, the initial inflammatory surge begins to recede noticeably. You will notice your lips shrinking back toward a more natural proportion, and daily movement like talking and eating will become much more comfortable.
What Changes During Week One’s End
- Noticeable Swelling Reduction: Approximately 50% to 70% of the peak swelling dissipates during this window.
- Bruising Color Shift: Dark purple bruises transition to greenish-yellow hues as your body breaks down stagnant blood cells.
- Softening Texture: The rigid, rubbery feel starts giving way to a softer, more pliable tissue texture.
- Light Chapping or Peeling: Because the lip skin stretched rapidly during the peak swelling phase, mild surface dryness or peeling is very common as it shrinks back down.
Care Tips for Days 4–7
- Switch from ice to gentle hydration. Once needle holes are fully closed (usually by Day 3 or 4), you can apply pure, fragrance-free lip balms or petroleum jelly.
- You may resume light exercise, but continue avoiding high-intensity workouts that trigger heavy facial flushing or excessive sweating until Day 7.
- Stay hydrated by drinking plenty of water, which helps the hyaluronic acid bind smoothly into the dermal matrix.
Days 8–13: Settling, Softening & Minor Adjustments
During the second week, your recovery transitions from symptom management to subtle cosmetic refinement. The filler is actively binding with your body’s natural water stores, integrating smoothly into the surrounding tissue structures.
What You Will Observe
- Near-Complete Resolution of Swelling: Residual swelling is minimal and mostly confined to deep tissue layers.
- Bruises Fade Away: Any remaining discoloration usually disappears completely by Days 9 or 10.
- True Shape Emerges: The actual lip contour, cupid’s bow definition, and volume proportions become visible.
- Softening of Micro-Lumps: Minor surface irregularities or firm spots typically smooth out naturally during this timeframe.
Note: Do not attempt to aggressively massage or squeeze any persistent bumps yourself unless specifically instructed and demonstrated by your injector. Unsanctioned massage can displace settled filler or cause unnecessary tissue trauma.
Day 14: Final Settled Results & Follow-Up Evaluation
Day 14 marks the official completion of the lip filler recovery process. At two weeks post-injection, all tissue trauma, vascular reactivity, and fluid retention have fully resolved.
| Feature | Day 2 (Peak Recovery) | Day 14 (Settled Result) |
|---|---|---|
| Volume | Overinflated due to edema | True volume achieved (approx. 20-30% smaller than Day 2) |
| Feel & Elasticity | Hard, tight, tender | Soft, natural, flexible movement |
| Symmetry | Often distorted by uneven fluid | Balanced according to the injector’s placement |
| Skin Condition | Stretched, bruised, red | Normal color, fully restored skin barrier |
If you still notice true asymmetry, structural gaps, or persistent firm lumps at Day 14, now is the appropriate time to contact your aesthetic clinic for a review. Your practitioner can perform a minor touch-up or evaluate if hyaluronidase (dissolving agent) is needed to refine your outcome.
Essential Post-Care Rules: Do’s and Don’ts
Adhering to strict post-procedure protocols is just as critical to your final result as the skill of the person holding the syringe. Follow these core rules throughout your two-week healing period.
The Do’s
- Do drink plenty of water: Hyaluronic acid relies on hydration to maintain smooth, plush volume.
- Do sleep on your back: Use an extra pillow to elevate your head for the first 3 to 5 nights to prevent fluid accumulation in your face.
- Do use Arnica or Bromelain: Natural supplements like Arnica montana or pineapple-derived Bromelain can help speed up bruise clearance.
- Do keep your mouth clean: Gently rinse after meals to keep entry points free of bacteria while they seal.
The Don’ts
- Don’t use straws or kiss forcefully for 48–72 hours: Repetitive puckering creates intense muscle contraction that can push fresh filler out of its intended position.
- Don’t consume alcohol or blood-thinning painkillers: Avoid alcohol, aspirin, ibuprofen, and high-dose Vitamin E for 24–48 hours post-treatment, as they worsen bruising.
- Don’t expose lips to extreme heat: Avoid saunas, steam rooms, hot tubs, or direct intense sunlight for the first 48 hours to prevent heightened vasodilation and prolonged swelling.
- Don’t receive facial treatments or dental work: Delay facials, chemical peels, micro-needling, or dental cleanings for at least 2 weeks post-filler to reduce infection risks.
Red Flag Symptoms: When to Contact Your Injector Immediately
While discomfort, swelling, and bruising are standard aspects of recovery, severe complications—though rare—require urgent medical intervention. Never hesitate to call your provider if you experience any of the following emergency warning signs:
- Vascular Occlusion (VO): Occurs when filler enters or compresses a blood vessel, blocking blood flow.
- Signs: Severe, escalating pain (not managed by acetaminophen), immediate or delayed blanching (skin turning stark white or pale grey), or a blue/purple net-like pattern (livedo reticularis) spreading beyond the lip border.
- Infection:
- Signs: Increasing heat, throbbing pain, worsening redness after Day 3, fever, or yellow/green pus oozing from injection sites.
- Severe Allergic Reaction or Anaphylaxis:
- Signs: Swelling that rapidly spreads to your tongue, throat, or entire face, hives, or difficulty breathing/swallowing (seek emergency services immediately).
Final Thoughts
Patience is the single most important tool in your lip filler recovery arsenal. It is completely normal to experience moments of doubt during Days 2 and 3 when swelling and bruising are at their height. Remind yourself that what you see in the mirror during the first few days is a temporary state of inflammation, not your final cosmetic outcome.
By following this 14-day recovery timeline, maintaining proper post-treatment care, and giving your tissue the full two weeks to heal, you ensure the safest, smoothest, and most flattering results possible.
Medical Disclaimer
This article is for informational and educational purposes only and does not constitute formal medical advice. Individual healing times and experiences with dermal fillers vary based on personal health history, injection technique, and the specific brand of hyaluronic acid used. Always consult with a licensed, qualified medical professional or certified aesthetic practitioner for personalized guidance and emergency evaluation.