Book Appointment Now
How to Reduce Lip Filler Swelling and Bruising Fast: Do’s and Don’ts
How to Reduce Lip Filler Swelling and Bruising Fast: Do’s and Don’ts
You leave your clinic appointment, glance in your rearview mirror, and feel a wave of panic. Your lips look double their intended size, uneven, and significantly tender. Tiny dark spots are already blooming into visible purple bruises.
Here is the truth right away: what you see in the mirror on day one is not your final result. Hyaluronic acid gel actively attracts water, and needle punctures cause immediate physical trauma. Your body responds with normal inflammation.
What you do during the first 48 hours determines whether your swelling calms in three days or lingers for two weeks. This detailed guide covers actionable steps, proven clinical tips, day-by-day healing stages, and exact do’s and don’ts to heal fast.
Why Lip Filler Swelling and Bruising Occur: The Underlying Biology
Lip enhancement with hyaluronic acid dermal fillers involves two main biological triggers: vascular needle trauma and fluid dynamics. Understanding these processes helps you manage recovery without panic.
1. High Vascularity of the Vermilion Border
Your lips contain one of the highest densities of micro-capillaries and nerve endings anywhere on your body. The superior and inferior labial arteries feed directly into complex vascular networks running throughout your lip tissue. Even an experienced injector using a blunt cannula or ultra-fine needle will nick tiny capillaries. When these micro-vessels tear, blood leaks into the surrounding tissue layers, creating visible bruising (ecchymosis).
2. The Hydrophilic Nature of Hyaluronic Acid (HA)
Popular dermal fillers like Juvederm, Restylane, and Teosyal consist of cross-linked hyaluronic acid chains. Hyaluronic acid is naturally hydrophilic, meaning it binds up to 1,000 times its weight in water. The moment the gel enters your submucosal lip layer, it pulls fluid from adjacent tissues like a sponge. This reaction creates dramatic initial puffiness that settles only after the filler integrates into your natural tissue architecture.
3. Histamine and Inflammatory Cascade
Mechanical puncturing breaks cell walls and triggers your immune system to release histamine, bradykinin, and prostaglandins. These chemical messengers widen local blood vessels, increasing blood flow to deliver repair cells. This deliberate widening causes redness, local heat, and tissue fluid buildup (edema).
The Essential Do’s: Proven Ways to Cut Swelling and Bruising Fast
Follow these practical, evidence-based steps during the critical 24- to 72-hour post-injection window.
1. Apply Cold Compresses Correctly (10 Minutes On, 10 Minutes Off)
Cold therapy narrows dilated capillaries, limiting blood leakage and reducing swelling. However, direct ice contact damages delicate mucosal skin and risks frostbite.
- Wrap a gel ice pack or clean bag of frozen peas in a clean cotton washcloth or sterile gauze.
- Hold the pack against your lips with feather-light pressure for 10 minutes, remove it for 10 minutes, and repeat.
- Do not press hard on the gel, as excessive pressure displaces unset filler.
- Limit cold therapy to the first 24 to 48 hours; continuing ice past day two slows down natural lymphatic drainage.
2. Sleep Elevated on Your Back
Lying flat allows fluid to pool directly in your facial tissue overnight. This explains why morning swelling is often dramatic. Elevate your head above your heart using two firm pillows or a wedge pillow for the first three nights. Keep strictly to your back to avoid pressing your lips into the mattress, which can create asymmetrical filler migration.
3. Use Arnica Montana and Bromelain
These natural remedies target tissue discoloration and inflammation effectively.
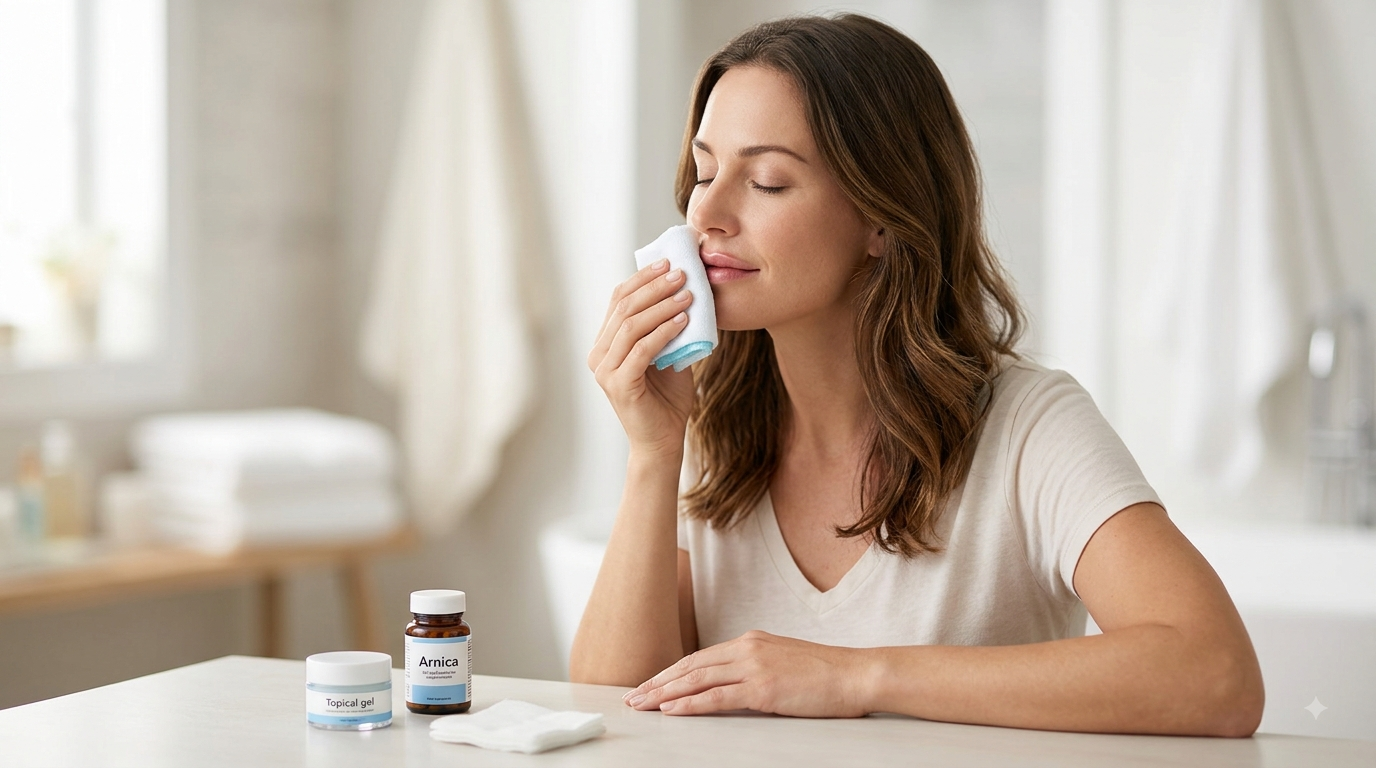
- Take oral homeopathic Arnica pellets sublingually (under the tongue) every four to six hours starting the day of your appointment. You can also dab topical Arnica gel around the outer lip perimeter after 24 hours.
- Bromelain is an enzyme extracted from pineapple stems that digests inflammatory proteins and speeds bruise clearance. Take 500 mg daily on an empty stomach or eat fresh, raw pineapple.
4. Stay Well Hydrated with Plain Water
Drinking water helps your body flush inflammatory metabolic waste and regulates osmotic pressure across tissue membranes. Aim for 2.5 to 3 liters of plain water daily. Avoid sugary energy drinks or heavily caffeinated beverages that dehydrate your system.
5. Use Acetaminophen (Tylenol or Paracetamol) for Discomfort
Mild aching, tightness, and tenderness are normal. Take standard acetaminophen according to package instructions. Acetaminophen relieves pain centrally without altering platelet function or thinning your blood, unlike common nonsteroidal anti-inflammatory drugs.
6. Apply Topical Vitamin K Oxide Cream
Once your injection puncture sites close fully after 24 hours, apply a thin layer of topical Vitamin K cream twice daily. Vitamin K accelerates the breakdown and reabsorption of pooled red blood cells, turning dark purple bruises yellow and clear much faster.
7. Eat Cold, Soft, and Low-Sodium Whole Foods
High dietary salt forces your body to retain water, directly increasing lip puffiness. Stick to cool, soft foods for 48 hours: Greek yogurt, chilled smoothies eaten with a spoon, applesauce, scrambled eggs, and cold soups. These options require minimal chewing and protect sensitive injection points.
The Critical Don’ts: Habits That Prolong Swelling and Darken Bruises
Avoiding common mistakes is just as important as aftercare remedies. Steer clear of these triggers during recovery.
1. Do Not Take NSAIDs or Blood-Thinning Supplements
Nonsteroidal anti-inflammatory drugs (NSAIDs) such as ibuprofen, Advil, Motrin, Aleve, naproxen, and aspirin inhibit platelet aggregation. Taking them increases internal micro-bleeding and doubles the size of bruises. Skip high-dose Vitamin E, fish oil (omega-3), ginkgo biloba, garlic supplements, and St. John’s Wort for 72 hours.
2. Do Not Drink Alcohol for at Least 24 to 48 Hours
Alcohol is a peripheral vasodilator that widens surface blood vessels. Drinking wine, beer, or spirits within 48 hours of treatment increases blood flow to your lips, restarts closed micro-bleeds, and worsens fluid retention.
3. Avoid Strenuous Exercise and Heavy Workouts
Vigorous weightlifting, high-intensity cardio, sprinting, and hot yoga raise your core body temperature and heart rate. Increased blood pressure pushes fluid into inflamed tissues, causing sudden flare-ups in swelling. Stick to light, flat-ground walking for the first 48 hours.
4. Skip Hot Showers, Saunas, Steam Rooms, and Sunbeds
High ambient heat dilates blood vessels and increases facial edema. Take lukewarm showers, avoid washing your face with hot water, and stay out of dry saunas, steam rooms, and direct sunlight for at least 72 hours.
5. Do Not Use Straws, Smoke, or Vape
Pursing your lips around a straw, cigarette, or vape generates significant inward suction and mechanical pressure. In the first 48 hours, hyaluronic acid gel remains malleable. Strong suction forces can displace filler into surrounding tissues or cause lumps along the vermilion border. Sip directly from an open, wide-rimmed glass.
6. Do Not Apply Makeup or Old Lip Balms for 24 Hours
Every needle insertion creates a microscopic open wound. Coating your lips with lipsticks, lip glosses, or used lip balms introduces bacteria into these channels, risking cellulitis or painful bacterial infections. Keep the area clean and bare for a full 24 hours.
7. Do Not Rub, Pick, or Vigorously Massage Your Lips
Feeling small, firm nodules or firmness along the inner lip mucosa is common in early recovery. Resisting the urge to squeeze, roll, or massage these spots is critical. Aggressive self-massage can flatten carefully placed product or spread it into unwanted areas. Only perform massage if your injector explicitly demonstrated a specific technique for your case.
8. Postpone Routine Dental Work and Facial Massages
Do not schedule dental cleanings, fillings, or procedures for two weeks before or two weeks after lip injections. Dental tools stretch your mouth aggressively, which can disrupt settling filler, and oral bacteria entering the bloodstream can colonize dermal filler matrices. Avoid facial massages, dermaplaning, and chemical peels near the mouth for two weeks.
Quick-Reference Summary Table: Do’s vs. Don’ts
| Category | Do This (Safe and Recommended) | Avoid This (High Risk) |
|---|---|---|
| Temperature & Swelling | Apply wrapped cold compresses for 10 minutes on and 10 minutes off. | Do not apply bare ice directly to skin or visit saunas and steam rooms. |
| Sleeping Posture | Sleep elevated on your back with 2 pillows for 3 nights. | Do not sleep flat on your stomach or compress your face into pillows. |
| Pain Relief | Use acetaminophen (Tylenol or paracetamol) for mild soreness. | Do not take ibuprofen, aspirin, Advil, or naproxen for 72 hours. |
| Diet & Hydration | Drink plenty of water; eat cool, soft foods and fresh pineapple. | Avoid high-sodium foods, spicy meals, boiling hot drinks, and alcohol. |
| Physical Activity | Take gentle, low-intensity walks. | Avoid heavy lifting, intense cardio, hot yoga, and straining for 48 hours. |
| Lip Movements & Care | Sip gently from open cups; use clean hands if touching lips. | Do not use straws, vape, smoke, or aggressively massage small lumps. |
| Cosmetics & Skincare | Keep lips clean and bare for the first 24 hours. | Do not apply lipstick, lip gloss, lip liner, or exfoliating scrubs. |
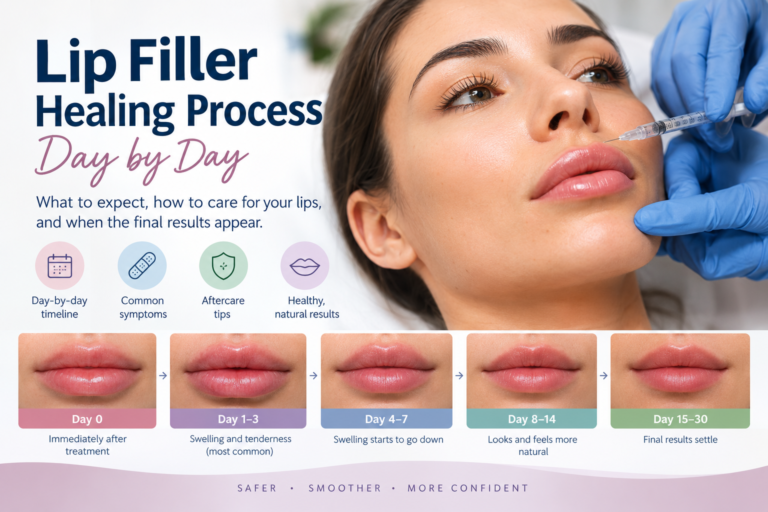
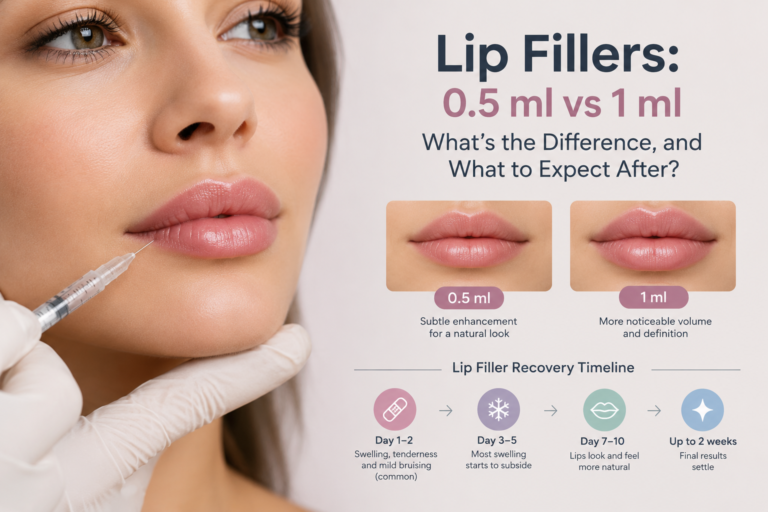
Day-by-Day Lip Filler Swelling and Healing Timeline
Knowing what to expect each day eliminates anxiety and stops you from judging your final results prematurely.
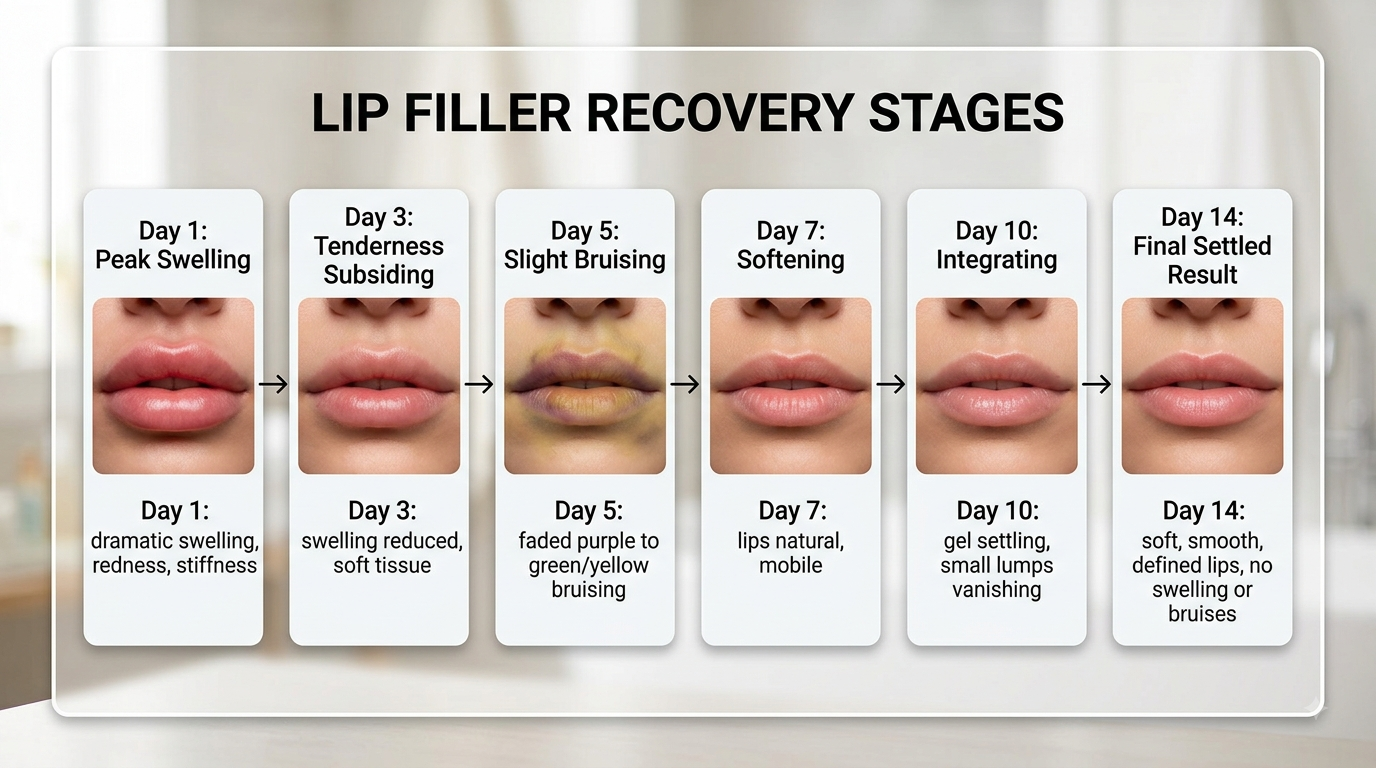
Day 0 (The First 6 Hours)
Immediately after your treatment, local anesthetic keeps your lips numb. As numbness wears off, dull throbbing sets in. You will notice visible puncture points, mild redness, and immediate fullness. Apply a wrapped cold pack for 10-minute intervals and drink cool water from an open glass.
Day 1 (24 Hours: The Onset of Peak Swelling)
Waking up on morning one is often startling. Fluid rushes to the lips overnight, making them appear significantly enlarged and stiff. The upper lip often projects more than the lower lip (the “duck” look). This asymmetry is caused by uneven fluid distribution, not poor injector technique. Red, blue, or purple bruises become visible.
Day 2 (48 Hours: Peak Swelling Stage)
Day two represents maximum inflammation. Tenderness peaks, and bruising may spread slightly toward the skin borders. Continue sleeping elevated, keep salt intake low, and take Arnica. Do not evaluate shape or balance today.
Days 3 to 4 (The Turning Point)
Fluid accumulation drops 30% to 50%. The initial stiffness eases, allowing more natural mouth movement. Purple bruises transition to green and yellow tones as hemoglobin breaks down. Small firm spots may be felt with your tongue, which is normal as the gel integrates.
Days 5 to 7 (Significant Improvement)
Most visible swelling resolves. Your lips soften and move naturally during speech and eating. Residual bruising can easily be covered with a light layer of tinted lip balm or lipstick. You can now resume normal workouts and routine social activities.
Days 8 to 14 (Full Tissue Integration)
Residual micro-swelling clears completely. The hyaluronic acid gel binds smoothly with your natural extracellular matrix. By day 14, what you see is your true, settled outcome. This is the correct time to attend your follow-up appointment for minor symmetry adjustments or touch-ups.
Comparison: Needles vs. Cannulas for Swelling and Bruising
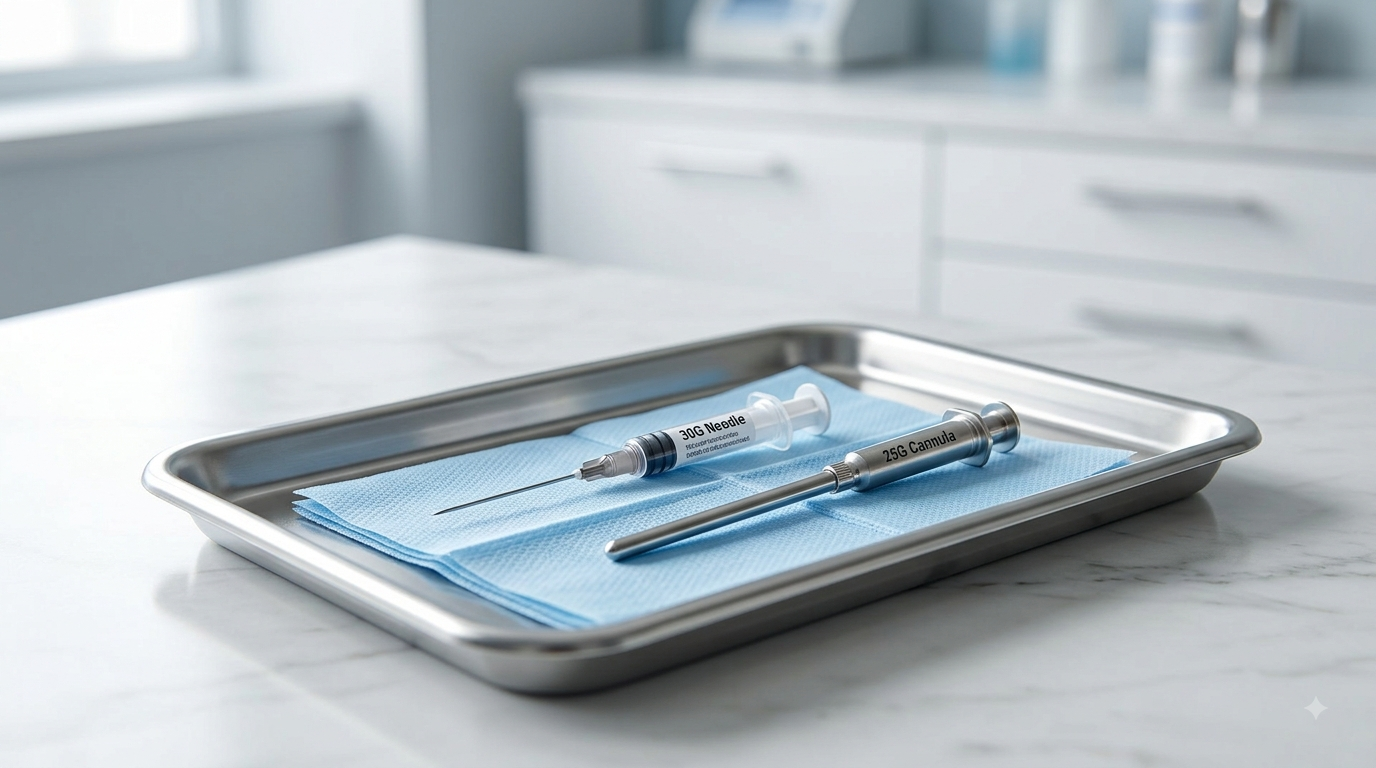
Your injector’s tool and method significantly influence the severity of your post-procedure downtime.
| Feature | Sharp Needle Technique | Blunt Micro-Cannula Technique |
|---|---|---|
| Puncture Entry Points | Multiple direct punctures along the lip line (often 6 to 12+). | Only 2 to 4 entry holes made with an introductory pilot needle. |
| Vascular Disruption | Sharp bevel can pierce through microscopic blood vessels. | Blunt tip pushes blood vessels aside instead of cutting them. |
| Bruising Risk | Moderate to high incidence of small localized bruises. | Significantly lower risk of surface bruising. |
| Precision & Border Work | Superior for crisp Cupid’s bow definition and fine vermilion edges. | Ideal for uniform volume distribution throughout the body of the lip. |
| Swelling Profile | Higher initial superficial swelling from multiple skin punctures. | Mild, deeper diffuse swelling that clears predictably. |
Normal Swelling vs. Complications: When to Seek Immediate Help
While swelling and bruising are expected, you must recognize rare clinical complications that require prompt medical intervention.
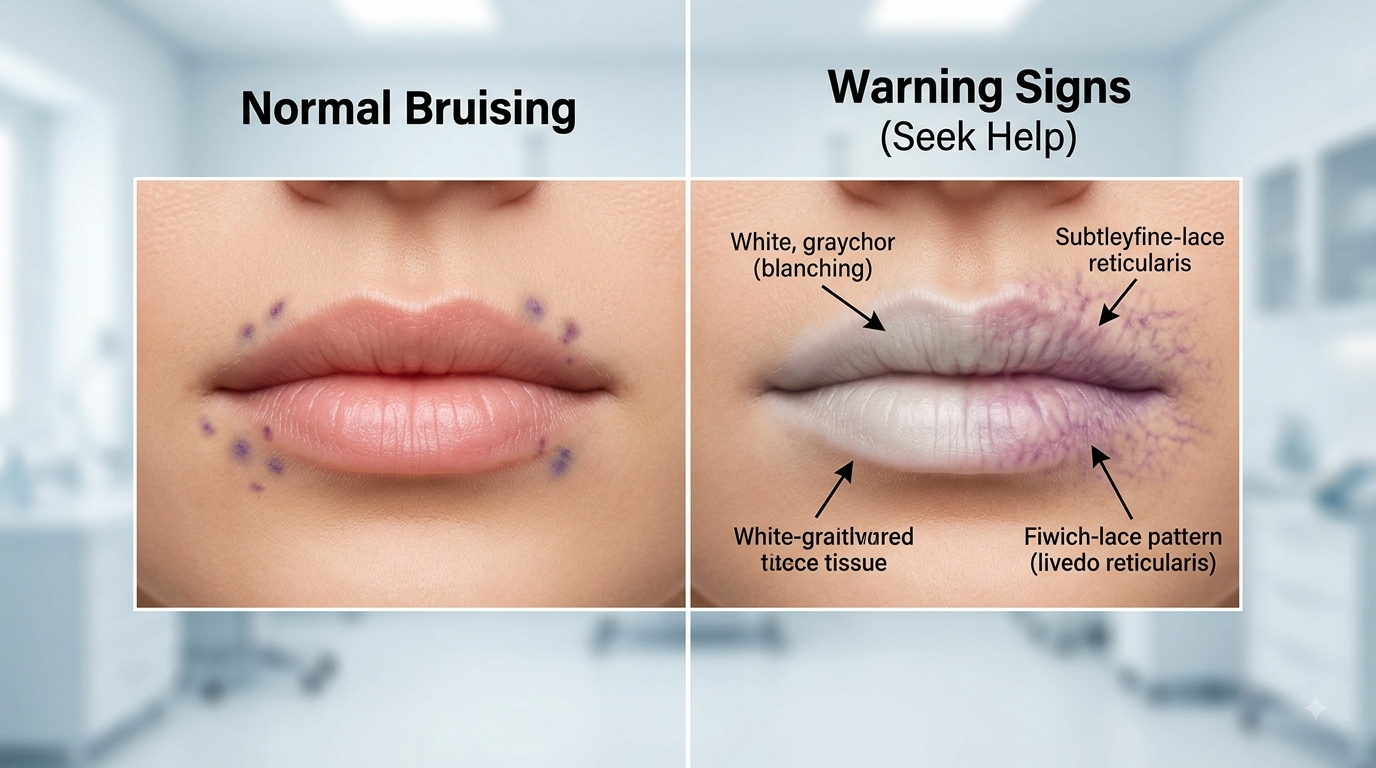
1. Vascular Occlusion (Medical Emergency)
A vascular occlusion occurs when filler material is accidentally injected into a labial artery or compresses it externally, blocking blood supply to skin and mucosal tissue. This requires emergency reversal with hyaluronidase (an enzyme that dissolves hyaluronic acid).
- Severe, Escalating Pain: Throbbing, sharp pain that worsens over time rather than dull soreness.
- Blanching (Skin Pallor): The affected area turns white, grayish, or pale compared to surrounding tissue.
- Livedo Reticularis: A mottled, purplish, lace-like discoloration extending beyond the lips toward the nose or chin.
- Delayed Capillary Refill: When you press gently on the pale area for two seconds and release, color takes longer than three seconds to return.
- Coldness: The affected tissue feels noticeably colder than the rest of your face.
2. Infection (Cellulitis or Abscess)
Bacterial infections can develop if sterile technique was compromised or if makeup was applied over fresh injection points. Symptoms include increasing heat, localized redness spreading outward after day three, throbbing pain, yellow crusting, pus discharge, or systemic fever. Infections require prescription oral antibiotics.
3. Herpes Simplex Virus (Cold Sore) Reactivation
The mechanical trauma of lip injections can trigger a dormant herpes simplex virus (HSV-1) outbreak. If you develop clusters of small, fluid-filled, tingling blisters along your lip border, contact your injector immediately for prescription antiviral medication (such as valacyclovir).
For detailed medical safety guidelines regarding dermal fillers and aesthetic procedures, consult official clinical resources provided by the U.S. Food and Drug Administration (FDA) and the American Society of Plastic Surgeons (ASPS).
Frequently Asked Questions About Lip Filler Recovery
Can an antihistamine help reduce lip filler swelling?
Yes. Over-the-counter non-drowsy antihistamines (such as cetirizine, loratadine, or fexofenadine) can reduce histamine-driven swelling during the first 48 hours. Always check with your injector or pharmacist before combining medications.
Why is my upper lip swelling significantly more than my lower lip?
The upper lip has a more delicate tissue structure, looser subcutaneous space, and receives more needle passes during shaping of the Cupid’s bow and vermilion border. As a result, the upper lip naturally swells more rapidly and dramatically than the lower lip.
Is it normal to feel hard lumps inside my lips after three days?
Yes. Early lumps are usually small pockets of localized swelling, minor internal hematomas, or concentrated gel that has not yet softened. As the filler integrates over 14 days, these spots flatten out naturally. Do not aggressively squeeze or massage them.
Can I drink hot coffee or tea after getting lip fillers?
Avoid scalding hot beverages for the first 24 to 48 hours. Extreme heat expands blood vessels, which increases swelling. Furthermore, if your lips are still partially numb from topical lidocaine, you risk burning your delicate mucosal tissue without feeling it.
When is it safe to kiss after lip filler injections?
Avoid passionate kissing, firm pressure, or repetitive puckering for at least 48 to 72 hours. Gentle, light pecks are fine after 24 hours, but firm pressure can displace unset filler and introduce oral bacteria to healing puncture marks.
Your Actionable 72-Hour Recovery Checklist
To ensure a smooth, low-swelling recovery, follow this clear timeline from the moment you leave your clinic:
- Keep your head upright for the first six hours, apply a cloth-wrapped cold pack for 10-minute intervals, drink cool water, and avoid touching your lips.
- Sleep strictly on your back with your head elevated on two pillows on night one; take acetaminophen if experiencing soreness.
- Continue elevated rest across days one and two, start oral Arnica and bromelain, eat low-sodium meals, and avoid exercise, alcohol, hot showers, and makeup.
- Transition from cold packs to normal room-temperature hydration across days three to five, watch bruises fade to yellow-green, and apply plain SPF lip balm once punctures close.
- Evaluate your final settled lip shape at day 14 and attend your scheduled clinic follow-up.